# Nintendo Switch®
Cronus Zen supports the Nintendo® Switch console, and all official Nintendo controllers.
Remember, when using Cronus Zen, any supported device *(controllers, mice, keyboards)* will work with your Nintendo® Switch console!
## Nintendo® Switch **Consoles**
***
| Console Version | Supported |
| ------------------------ | ------------------------------------------- |
| Nintendo® Switch | **YES** |
| Nintendo® Switch OLED | **YES** |
| Nintendo® Switch Lite | **YES** |
| Nintendo® Switch TV Dock | **YES** |
## Nintendo® Switch **Controllers**
***
| Controller Model | USB | Bluetooth |
| ------------------------------- | ---------------------------------------- | ------------------------------------------- |
| Nintendo® Switch Joy-Cons (L+R) | **NO** | **YES** |
| Nintendo® Switch Wireless Pro | **NO** | **YES** |
## **Licensed Controllers**
***
| Controller Model | USB | Bluetooth |
| --------------------------- | ------------------------------------------- | ------------------------------------------- |
| Hori D-Pad Controller (L+R) | **NO** | **YES** |
| Hori Switch Horipad | **YES** | **NO** |
| Gulikit ZEN Pro | **YES** | **YES** |
## **Enable Wired Comms**
***
You must enable Pro Controller Wired Communication for Cronus Zen to correctly pair with the Nintendo Switch.
* System Settings > Controllers and Sensors > Pro Controller Wired Communication: **On**
Nintendo Switch - System Settings
## Controller Setup
***
This guide will show you how to connect any controller to a Nintendo® Switch console.
Game with any device on your Nintendo® Switch
## **Nintendo® Switch TV Dock**
***
When using a Switch TV Dock, make sure the 15v power supply is connected or the Zen will not power on.
If you are using the Switch in Handheld mode, you'll also need an OTG USB-C Adapter for the Cronus Zen to connect successfully.
* **Nintendo® Switch Wireless Pro (Bluetooth):**
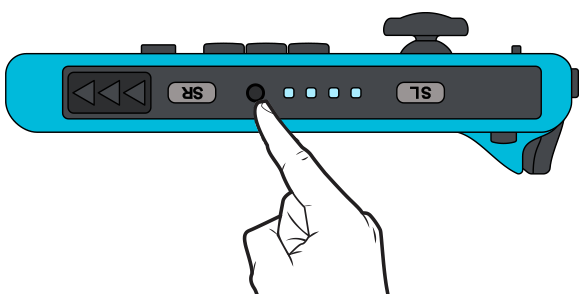
* Tap Zen's Bluetooth pairing button (P2) for pairing mode.
* Hold down the sync button and after a few seconds it will pair with the Zen.
* **Nintendo® Switch Joy-Cons (Bluetooth):**
* The Nintendo Switch Left & Right Joy-Con Controllers have to be paired separately to the Cronus Zen.
* Tap Zen's Bluetooth pairing button (P2) for pairing mode, then hold down the **Joy-Con (Left) sync button** and after a few seconds it will vibrate.
* Tap Zen's Bluetooth pairing button again, then hold down the **Joy-Con (Right) sync button** and it will also vibrate.
Nintendo® Switch Joy-Con Left SyncNintendo® Switch Joy-Con Right Sync
* **Crossover Gameplay:**
* Non-Nintendo® Switch USB controllers connect to Zen's A3 USB port.
* **Note:** An AUTH controller connected to A1 is not required.
* **Bluetooth Pairing:**
* Tap Zen's Bluetooth pairing button (P2) for pairing mode, then...
* **DualSense****®** **Controllers:** There is currently no Bluetooth support. Use USB.
* **Xbox**® **Controllers:** There is currently no Bluetooth support. Requires adapter.
* **Nintendo**® **Switch Controllers:** Hold down Sync buttons for pairing mode.
* **DualShock® Controllers:** Hold down SHARE + PS for pairing mode.
* **Wireless Adapters:**
* To achieve wireless support for Xbox® controllers, the Xbox Wireless Adapter is required. Plug it into A3, connect the Xbox® controller to A2 for a few seconds, then unplug. Soon, the LED on the Adapter and controller will turn solid white, indicating successful pairing.
* The Astro® C40 adapter can also be connected to A3.
**IMPORTANT**
Your controller might not charge when connected via Zen. Ensure its fully charged or equipped with fresh batteries to prevent disconnections.
## Switch Headset Support
***
While the Switch itself doesn’t offer a direct wired headset connection via the Joy-Con or Wireless Pro controllers, we've engineered a sweet workaround for when it's docked.
When your Switch is nestled into a **Nintendo Switch TV Dock**, our added technical wizardry allows you to game using a DualSense, DualShock4, or Xbox Series X|S controller, all while enjoying full wired headset support.
Here’s your guide to popular controllers that enable headset support while gaming on the docked Nintendo Switch. Just ensure all controllers are connected to A3.
| PS4 DualShock4 v1 (CUH-ZCT1X) | **NO** | **NO** |
| ----------------------------- | ------------------------------------------- | ------------------------------------------- |
| PS4 DualShock4 v2 (CUH-ZCT2X) | **YES** | **YES** |
| PS5 DualSense | **YES** | **NO** |
| Xbox Series X\|S | **YES** | **NO** |
| Xbox One | **YES** | **NO** |
## **Check Zen Connection**
***
Navigate to 'Controllers' from the Switch menu and observe the icon:
* If it displays 'USB', the Switch is correctly synced to the Zen.
* If the 'USB' is not displayed, tap Zen's reset button to resynchronize.
Cronus Zen is connected.Cronus Zen is disconnected.